Saved Filters are specific sets of criteria that you have used and saved on the Advanced Search in the Users area. A Saved Filter is useful when you have a specific or extensive set of users that you frequently search for or need reports on.
Rather than re-entering the filter criteria every time you need a report on a particular set of users, you can click the Saved Filters button and choose the filter that you need. Your saved filter criteria will load automatically.
Let's take a look at creating an example saved filter criteria and then we will create a custom report using the saved filter.
Creating a Saved Filter
- Go to the User list - click on the Users icon in the main navigation menu.
- Access the Advanced Filter

- Click the Filter dropdown in the top right corner
- Click the Advanced option
Add Advanced Filter columns
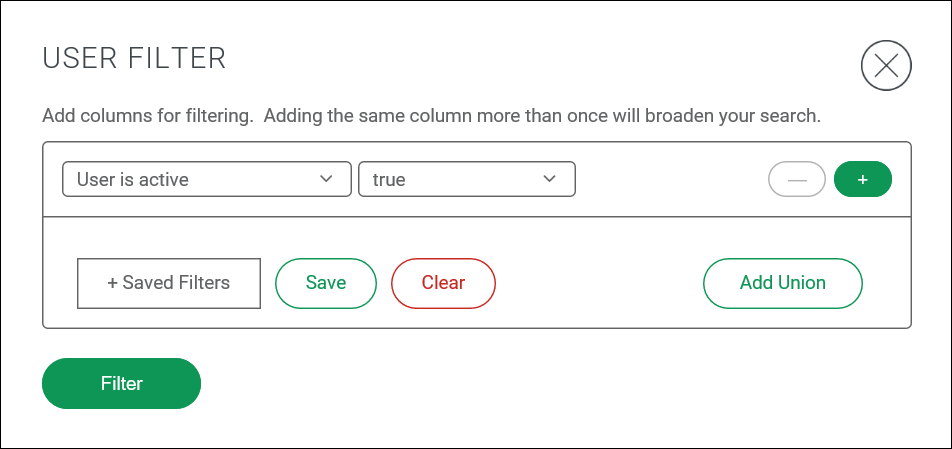
In the pop-up User Filter window, create as many filters as you need. Use the dropdown menus to create specific filters.
NOTE: Use the + sign to add more filters. Use the - sign to remove filters. Use the Add union button to create an "or" operator that enables you to add more than one group of filters to an advanced user filter. For example, when you use the "Add union" feature, the filter will now pull two different sets of users, those that match the description before the union and those that match the description after the union.
Save User Filter

- To save this filter for use across the LMS, click the Save button.
This sample User Filter will pull data for all active users hired last year and all inactive users hired last year. This can be useful for keeping track of how many people go in and out of your LMS over the years.
Name Your Filter

- When you click Save, on the User Filter window, you will be prompted to name your filter. Name it and click the OK button. You will get a confirmation message stating the filter has been successfully saved. Click the OK button.
Using a Saved Filter
- Create a Report
- Click Reports in the main navigation menu
- Click the New Report button in the top right corner of the page
- Choose the Report type
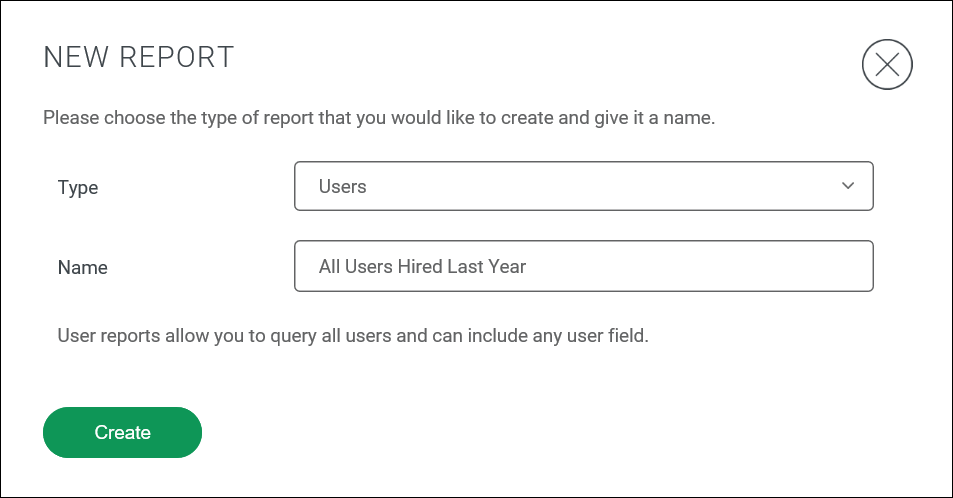 For this example, choose the Users report type as this will give us the most relevant options with the example user filter we saved and are going to use. Title the report, then click the Create button.
- Add the Saved Filter

- Click the Edit Query button at the top right of the page
- In the Report Query window, click the Saved Filters button
- Click on the title of the saved filter - in this example All Users Hired Last Year
 Now the Filter criteria for the report is identical to the saved filter created using the Advanced filter on the User list.
 - Click the Update button and the report will preview on the main report page
- Don't forget to click the Save button to save your report!