We're huge fans of Groups at Intellum: The Wu-Tang Clan, Phish, Creedence Clearwater Revival, Spice Girls - we could go on. Some of the best Groups are pieced together member by member, while others come together organically around a common vision--there's no one right way to form a Group.
Similarly, Exceed helps you create Groups geared to fit your unique learning management needs. Groups are objects to help administrators manage users who share common attributes. Utilizing Groups lets you target segments of your learning audience with custom access to content and automatic assignment of learning Activities.
This article introduces the Group types in the Intellum Platform and walks you through accessing your Group List, creating a new Group, and updating Group membership.
MANUAL GROUPS & AUTO GROUPS
You can define two types of Groups: Manual, which allows you to choose specific users to be members of the Group, and Auto, which allows you to set filters through commonly used system attributes that automatically pulls users who meet those criteria into the Group. Note: only unrestricted administrators may create Groups.
Here are a few examples to help you contextualize this concept:
- An Auto-Group of your users located in the Eastern Time Zone.
- An Auto-Group of users who are all General Managers.
- A Manual Group of users who have volunteered to act as Event or Activity Facilitators.
- A Manual Group of users currently enrolled in your Product Onboarding Path.
ACCESSING GROUPS & THE GROUP LIST
From the left navigation menu, click the Groups tab to easily access and manage your Groups.
The Group List page displays all of the Groups currently in the system in alphabetical order. At the top right section of the page is a dropdown button:
Membership - You can filter the Group list on this page by All, Auto, or Manual Groups.

CREATING A NEW GROUP
To create a new Group, click the Create New Group button in the top right corner.
On the Create New Group page, you will see a short list of fields required to define your new Group:
- Name - give your Group a name that makes sense contextually.
- Code - the code is a unique identifier for your Group, and it will identify said Group via the integrations and reporting elements of it.
- Summary - a description of your Group.
Auto Find Users - if you leave this box unchecked, this Group will be a Manual Group. If checked, a Filter section will appear and you will need to define the filters to make this Group an Auto Group. You may use many of the available User fields to make a decision regarding the criteria for the type of Auto Group you want to define. You can add more filters to the query by using the blue + sign. To remove a filter, simply click the - button.
Adding different columns for filtering creates an AND operator in your query and narrows your search.
Adding the same column for filtering creates an OR operator in your query and broadens your search.

When you are finished defining your Group, click the Create Group button. You will see some additional fields appear on your screen:
- Available Applications - Groups defined in the Intellum Platform can be used to regulate access in our other applications if you are using them. Check the box next to each app you would like the Groups to be able to access.
- Catalog Restrictions - you can restrict catalog enrollment for specific Activities to users in this Group.
- Topic Restrictions - you can restrict which users can access specific topics in this Group.
- Auto Enrollments - this field is informational only and it will display which Activities are set up to create enrollments automatically for members of this Group.
At the top right of the page, you can use the Action dropdown icon to select the Delete option and delete the Group, if you so desire.
ACCESSING & UPDATING GROUP MEMBERS
At the top left of the page, you'll see a Members tab. If you click on it, you'll see a list of users who are members of the Group. At the top right are three buttons:
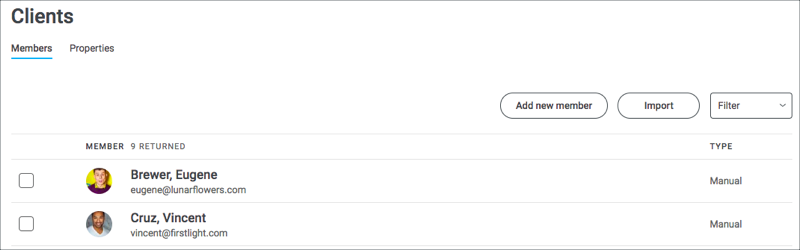
- Add new member - click this button to display a pop-up box that allows you to choose users to add to this Group. This is how you will add users to your Manual Group, although you can add ad hoc members to your Auto Group this way as well.
- Import - You can import users into this Group using a .csv file.
- Filter - You can filter the user list on this page by Active or Inactive users.
Removing a user who was manually added to a Group is simple. Click the checkbox to the left of their name, and you will see a Revoke manual membership button appear at the top of the page. Click this button and click OK in the confirmation pop-up to remove this user from the Group.
The only way to remove users who were automatically added to a Group is to redefine the criteria for the Group. Users who match the new criteria will automatically be added, and those that no longer match the criteria will automatically be removed.